
What Is 3D Aerial Rendering, and When Does Your Project Actually Need It?
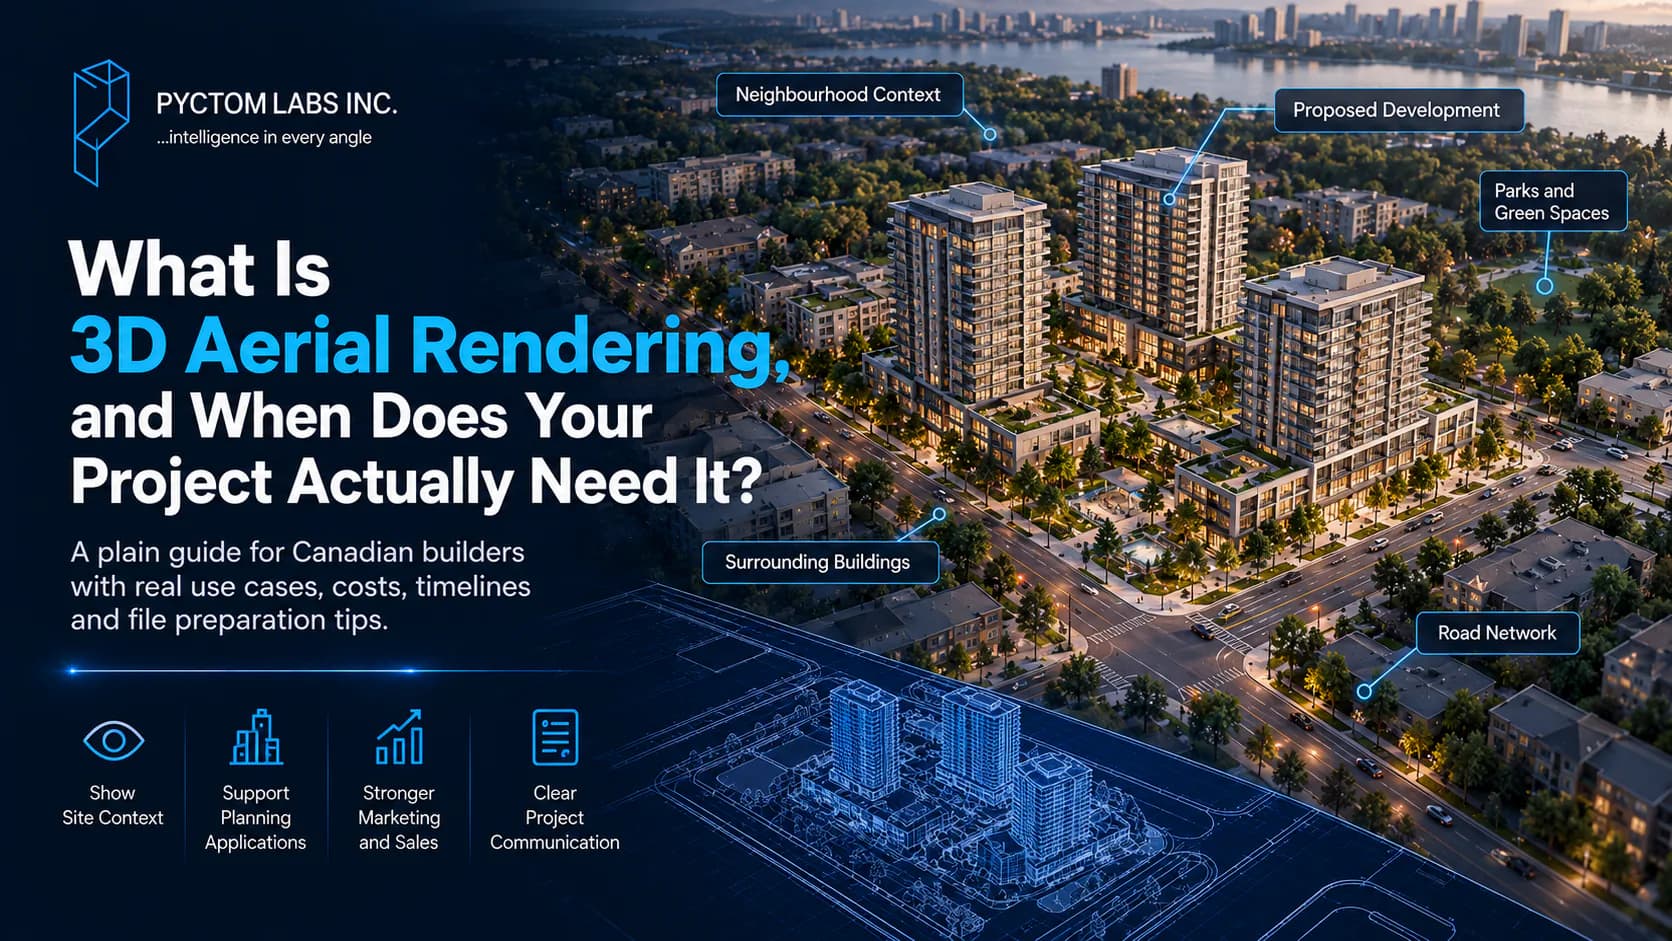
Table of Contents
How do you show a review board that your site fits its surroundings, when all you have is flat drawings and a location map? An aerial rendering answers that question in one image.
In this guide, we cover what 3D aerial rendering shows, when it helps at a rezoning meeting, what it costs, and how to prepare your files for a rendering team.
What does a 3D aerial rendering show?
It shows your unbuilt project from above, set into its real surroundings. Rooftops, facades, streets, landscaping and the neighbouring blocks all appear in one frame.
A 3D aerial rendering is a computer generated image of your project seen from above, like the view a drone or small plane would capture. The key difference is that the building does not exist yet. A designer models it and drops it into its real setting.
The three things it puts in one frame:
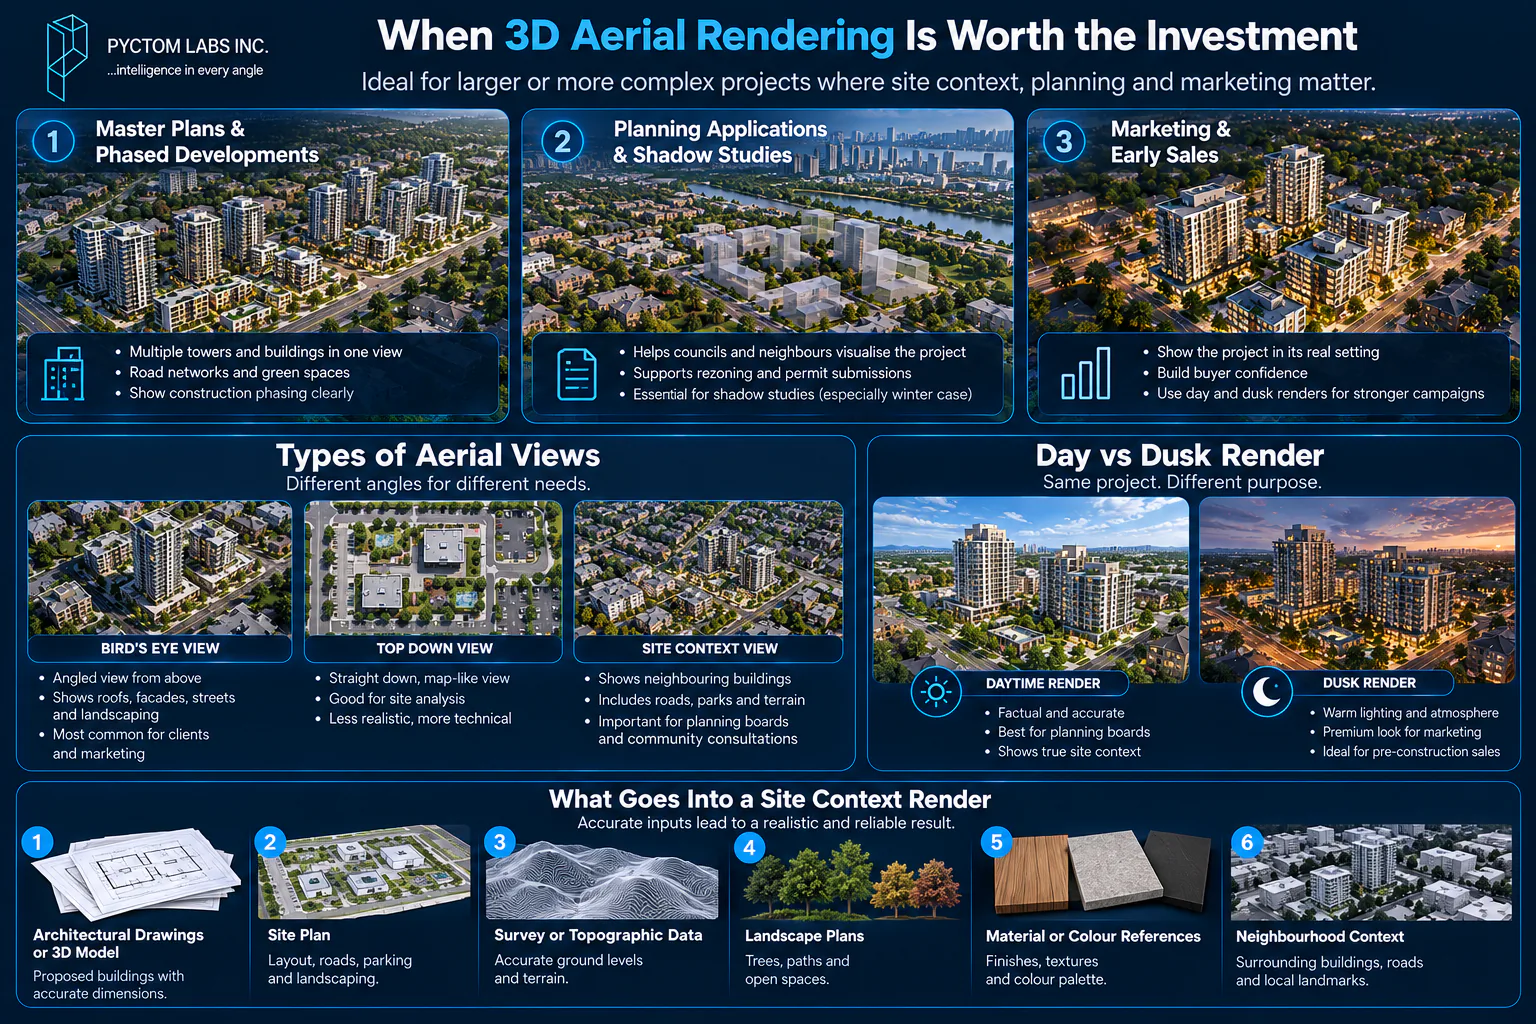
- Bird's eye view: looks down at an angle and shows rooftops, facades, streets, and landscaping together. This is what most clients want.
- Top down view: looks straight down, more like a map, and reads less like a real place.
- Site context: places your project among its neighbours: roads, existing buildings, parks, and grade (how the land rises and falls). This is often what a planning board cares about most.
When is 3D aerial rendering worth the investment?
When the site is large or complex, or when a board, a neighbourhood or a buyer has to understand how the project fits its surroundings. A single infill home rarely justifies the cost.
Not every project needs a view from the sky. Larger or more complex sites are where it pays for itself.
Master plans and phased developments
One aerial image can explain years of construction at a glance:
- Several towers, road networks, and parks in a single view
- Construction phasing, meaning which parts get built first, second, and later
Planning applications and shadow studies
Canadian municipalities increasingly expect visuals with rezoning and permit submissions, and people object less once they can see the likely outcome.
- A clear aerial view helps planners and neighbours picture the proposal
- Many municipalities also require a shadow study for taller buildings
- The winter case matters most in Canada, where the low sun casts long shadows
Marketing and early sales
The time of day changes the whole message, so many campaigns order both from the same angle:
- Daytime render: reads as factual and accurate; best for planning boards
- Dusk render: deep blue sky, warm lit windows; the premium hero shot for pre-construction sales
Advisor Insight: On a recent Calgary project, the board barely discussed the tower design. Their questions were all about shadowing, and we had rendered the winter case up front.
What other rendering options can you consider?
An animated flythrough, a real-time interactive model, a VR walkthrough or AI concept tools. Each costs more or suits a narrower audience than a still, so start with the still.
A still image is the entry point. It is the cheapest and fastest deliverable, and one strong aerial still often does everything a rezoning submission needs.
Beyond that, the menu scales with budget and audience:
- Animated flythrough: a moving camera through the scene; suits marketing launches; costs the most
- Real-time and interactive: built in tools like Twinmotion or Unreal Engine; viewers move through the project on a laptop or website; ideal for phased communities
- VR walkthrough: places buyers inside the project through a headset; suits premium sales centres
- AI tools: useful for early concepts and quick variations, but not yet reliable for an accurate context render a board will accept
What goes into a site context render?
Drawings or a 3D model of the building, a site plan, survey data, landscape plans and finish references, plus data on the neighbourhood around the site.
Good renders start with good inputs. The more accurate your files, the more accurate the result. Studios usually ask for:
- Architectural drawings or a 3D model of the proposed buildings
- A site plan showing layout, roads, parking, and landscaping
- Survey or topographic data for accurate ground levels
- Landscape plans covering trees, paths, and open space
- Material or colour references for finishes
The neighbourhood around your site also has to appear, and coverage varies across the country:
- Toronto, Vancouver, and Calgary offer strong open data on building footprints and heights
- Smaller municipalities may publish little or none, so studios model context by hand, which adds time and cost
For a full checklist, see the files you need for a 3D rendering.
Should you use drone photography or 3D aerial rendering?
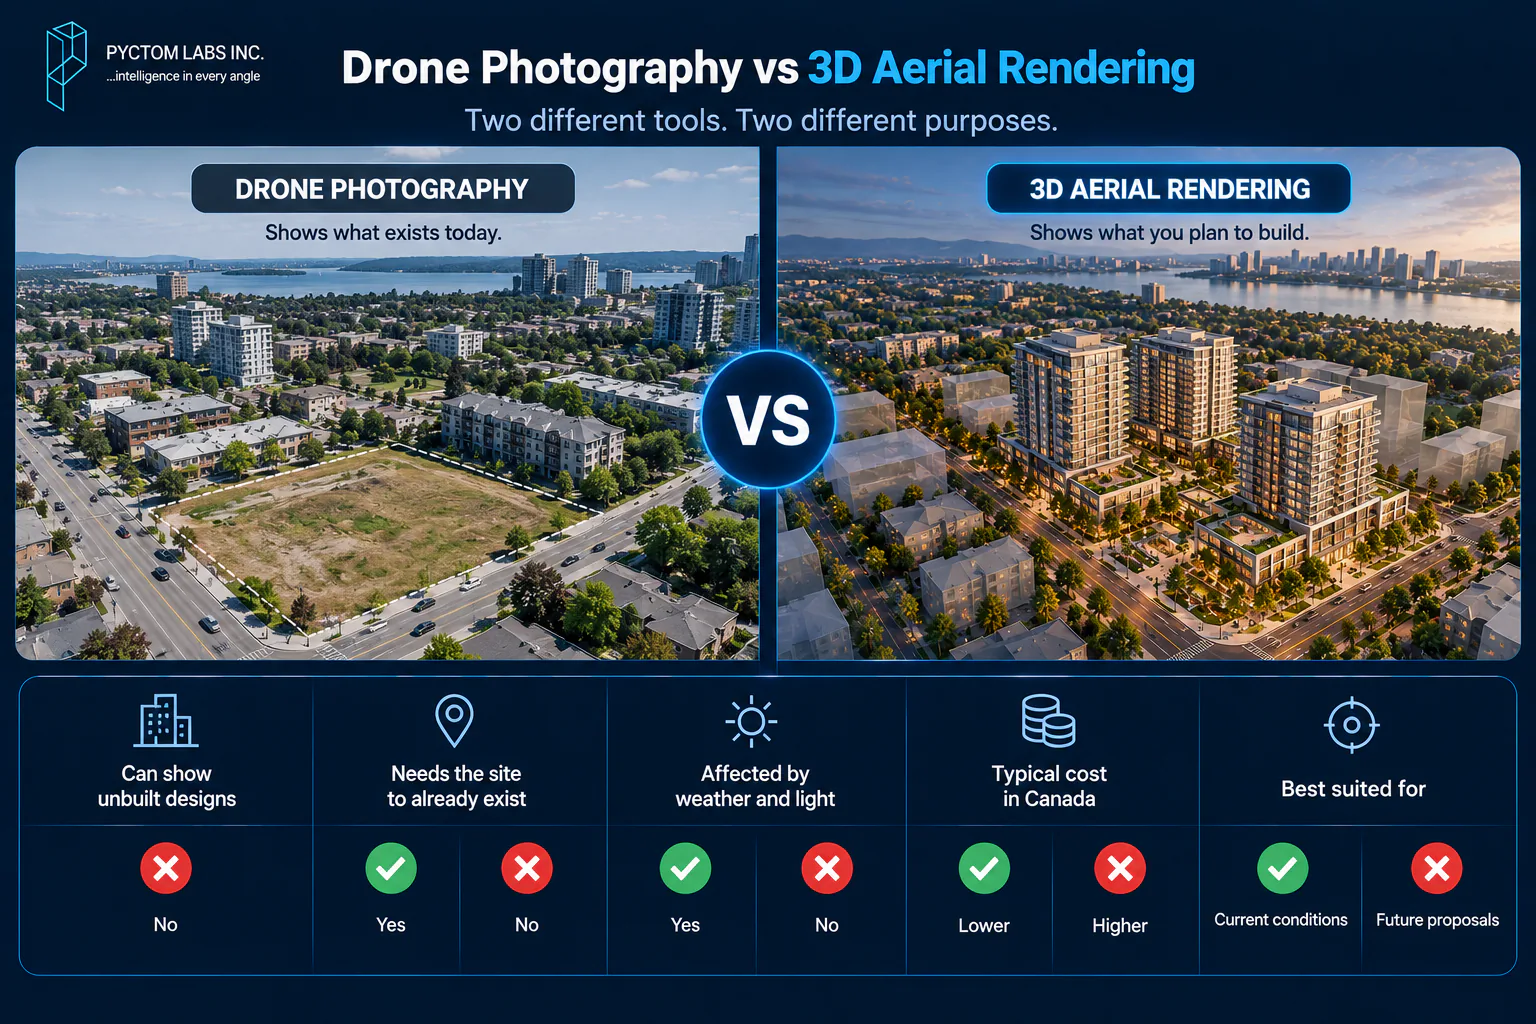
Use drone photography to show what exists today and 3D aerial rendering to show what you plan to build. Many projects combine the two in a photomontage.
People sometimes assume a drone photo can do the same job, but the two solve different problems. A photo captures what exists today. A render shows what you plan to build tomorrow.
| Question | Drone photography | 3D aerial rendering |
|---|---|---|
| Can show unbuilt designs | No | Yes |
| Needs the site to already exist | Yes | No |
| Affected by weather and light | Yes | No |
| Typical cost | Lower | Higher |
| Best suited for | Current conditions | Future proposals |
Two points worth knowing before you brief a team:
- Photomontage: many projects combine a drone photo of the real site with a rendered building on top
- Drone rules: flights in Canada are regulated by Transport Canada; your pilot needs the right RPAS certificate, plus airspace clearance in some areas
How much does 3D aerial rendering cost in Canada?
Roughly 1,500 to 3,500 CAD for a single building still, 4,000 to 10,000 CAD for a detailed master plan, and 15,000 CAD and up for an animated flythrough.
There is no single price, because scope varies so much. These ranges reflect the current Canadian market:
- Simple single building aerial still: roughly 1,500 to 3,500 CAD
- Detailed master plan with full context: roughly 4,000 to 10,000 CAD
- Large phased development with multiple views: 10,000 CAD and up
- Animated flythrough or marketing video: often 15,000 CAD and up
Within any range, the price is driven by:
- Number of views or camera angles ordered
- How much context must be modelled by hand
- Level of detail, output resolution, and time of day
- Number of revision rounds, and how tight your deadline is (rush work costs more)
For how these prices compare with other render types, see our guide to 3D rendering costs in Canada.
How long does a 3D aerial rendering take?
One to three weeks for a single still, four to six weeks for a complex master plan, and close to two months for an animation.
Timelines depend on scope and detail, but as a rough guide:
- Single aerial still: one to three weeks
- Complex master plan: four to six weeks
- Animation: close to two months
Advisor Insight: Projects rarely run late because rendering is slow. They stall because inputs like the survey or final massing arrive weeks after they were promised.
See the full architectural rendering timeline for what happens at each stage.
How do you avoid costly aerial rendering mistakes?
Lock the design before final rendering, test the viewpoint, match the image to its audience and settle usage rights in writing.
A few avoidable errors waste both money and time. Spotting them early keeps your project on budget.
- Lock the design first: most studios produce a greyscale draft that fixes the angle and massing; approve it slowly, because changes are cheap at that stage
- Choose the viewpoint carefully: ask for two or three test angles before committing budget to the strongest one
- Match the audience: boards want honest accuracy, buyers want atmosphere and light; tell your studio which up front
- Settle rights in writing: confirm reuse across hoardings, web, and print, and whether you own the working files or only the final image
How can Pyctom help with your aerial rendering?
We scope the job before you spend, check your files and make sure the deliverable suits the audience you need to convince.
An aerial render is an investment. When it is done right, it accelerates the approval process and can help to sell units faster. If it is not executed well, it causes confusion for the people you need to convince.
Our experts will guide you by scoping the task before spending, checking your files and ensuring the deliverable is suitable to the audience. Browse recent projects in our portfolio to see the range and finish we deliver. Don't forget that municipal needs vary from province to province, and city to city. Therefore, check out what your local authority will require before you place your order.
Ready to show your site in context? See our 3D aerial view rendering services and send us your plans for a quote.
Frequently asked questions
What is 3D aerial rendering used for?
It presents a plan of a project before it has been constructed. Common uses are planning submissions, community consultation, and marketing. It works best for larger or more complex sites.
How much does a 3D aerial rendering cost in Canada?
A simple single building can cost 1,500 to 3,500 CAD, and a detailed master plan is likely to range from 4,000 to 10,000 CAD. Animations usually start around 15,000 CAD. The price depends on details, revisions and deadlines.
How long does an aerial render take to produce?
A single still usually takes 1-3 weeks and a larger master plan takes 4-6 weeks. Animated flythroughs may need close to two months. The quickest way to get on schedule is to provide comprehensive files in advance.
Do I need a shadow study for my planning application?
Many Canadian municipalities require one for taller or larger buildings. It reveals how your building blocks sunlight throughout the seasons and the winter case is most important. Check with your local authority early to ensure the exact requirement.
Can a drone photo replace a 3D render?
Not for showing something unbuilt, since a photo only captures what exists. A drone shot with the current site conditions is great, and for many projects a drone photo is paired with a rendered building on top. That combination of the two is known as a photomontage.
Disclaimer: The information provided in this blog is for general informational purposes only. For professional assistance and advice, please contact experts.